


How to Make Real Sugar Skulls From Scratch
First, you’re going to need some molds. Most of my molds are from MexicanSugarSkull.com, but you can also find them on Amazon. I highly recommend you visit the Mexican Sugar Skulls website after you read through this post to get more tips. I learned a lot through my own trials and errors, but ultimately they started me off in the right direction and saved me a ton of time. Also, you can purchase all the tools and materials you will need from there too.
If you don’t have the time to make them at home, you can also buy everything made and ready to go from my store where you can find a variety of kits already put together for you. Can't find the kit you're looking for there? Feel free to send me a message from our contact us page with your questions.
OK, let’s get started!
Let’s start with a list of what you will need to make the sugar skulls:
- Sugar skull molds
- Large bowl
- Measuring cup
- Large spoon or whisk to combine (or you can use your hands)
- 1 teaspoon measuring spoon
- Regular white granulated sugar (I would start with a 10 pound bag)
- Meringue powder
- Water
- Cardboard squares (that are at least 5″ x 6″ in size)

The amount of sugar you are going to need will depend on the size and amount of the sugar skulls you make. My advice is to get a 10 pound bag and start there.
For every 1 cup of sugar you use, add 1 teaspoon meringue powder + 1 teaspoon water. Combine the sugar and meringue powder well before adding the water.
Mix all three together until the sugar feels almost like damp sand and can be shaped in the palm of your hand when squeezed.
Begin packing the molds by making sure all the small details are tightly packed first – such as the eyes, nose, and mouth. Then finish packing more sugar into the mold until completely full.

Using one of the cardboard squares or a scraper, scrape off the excess sugar to create an even, flat back surface.
Place a cardboard on top and flip the whole thing over. Gently lift off the mold and let the sugar skull dry at least three hours.

After three hours, scoop out some of the sugar from the center of each skull half, leaving a thick border around. Be careful not to scoop out the neck part though. Do not skip this step! It’s important to remove some of that excess sugar to speed up the drying process and prevent moisture build-up.
Once you’ve removed the extra sugar, allow them to dry hollow-side-up overnight.

With the extra sugar that you have left and have scooped out, you can reuse it to make one batch of the small molds if you have one.
If the leftover sugar feels a little dry, sprinkle a little bit of water onto the sugar with your hand or a spray bottle and mix it again before filling the molds again. Let the smaller ones dry completely before decorating.
How to Assemble Sugar Skulls
After the second drying phase, it's time to glue the sugar skull haves together with royal icing.
To make the royal icing, you will need:
- 4 cups confectioners’ sugar (powdered sugar)
- 3 tablespoons meringue powder
- 5 tablespoons water
- An electric mixer with paddle or whisk attachment
- 12 inch disposable decorating bags for icing (plus more for colored icing)
- Rubber band or an icing bag tie
If you’re having a sugar skull decorating party and want to make larger batches of royal icing, use the following ratios:
One 2-pound bag of confectioners’ sugar + 1/2 cup meringue powder + 2/3 cup water.
Combine the confectioners’ sugar with meringue powder on low speed for a minute, then add the water. Keep mixing it on low until it starts to look like icing, then increase the mixing speed to medium-low (a 2 on the Kitchen Aid mixer I think). Mix for 3-5 minutes with a whisk or paddle until the icing begins to form stiff peaks. If you feel like it’s too stiff, mix in one teaspoon of water at a time until it’s soft enough to pipe, but can still hold its peaks. If you’re using a whisk, the time will be closer to 3-4 minutes.
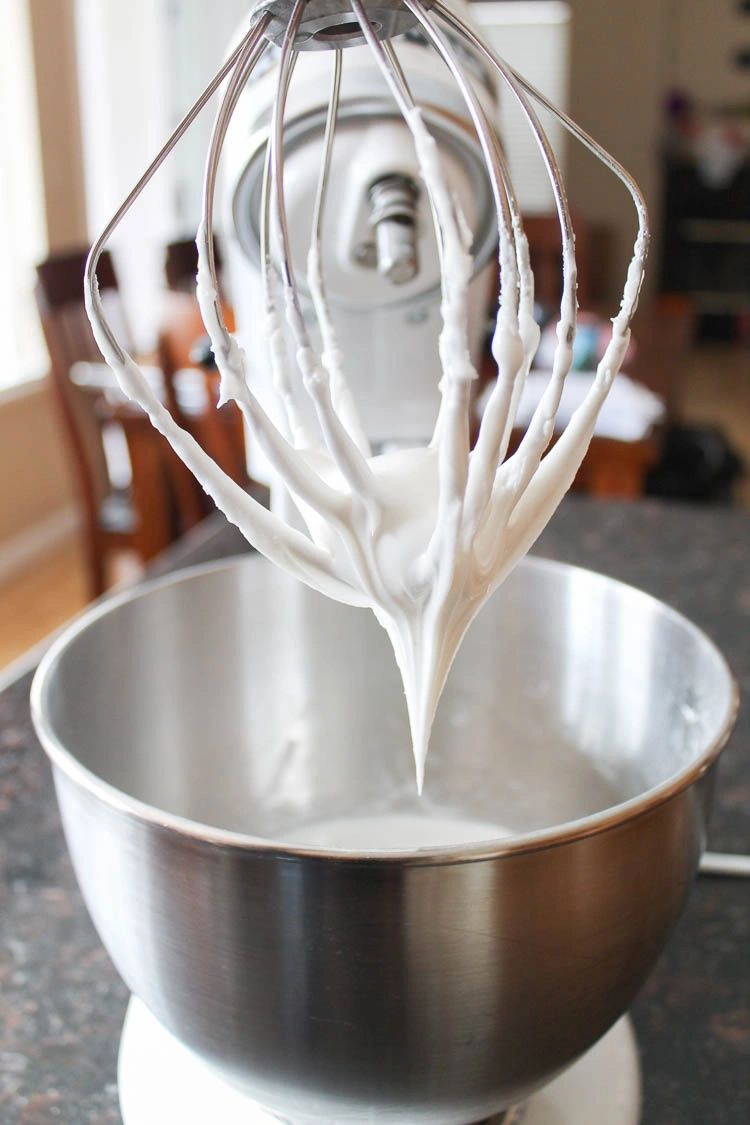
Fill a disposable icing bag with the icing, but not too close to the top or it will be a bit more difficult to manage when squeezing. I made that mistake and ended up having to remove the tie and squeeze it back in.
Royal icing piping bag tip: If you have a difficult time filling the piping bags, use a tall skinny cup to hold the bag upright for you.

Squeeze a thick ribbon of icing onto the back half of the sugar skull, then quickly align and press the two together. If none of the icing came out after pressing them together, add a thin line of icing along the line where they meet, then wipe it off with your finger to help create a smoother seal.
It is helpful to keep one damp and one dry kitchen towel nearby to clean the excess icing off your fingers after each assembly.

Let them dry at least three more hours before decorating.

Sugar skulls made of sugar should last a long time. I have a few that I've kept though the years that are still in excellent shape. The key is to store them in a dry environment.
Next step is the fun part! It's time to decorate! When it comes to decorating your sugar skulls, spend some time thinking about how you want to decorate them. Since they won't expire or go stale like a cookie would, you have time to really put some thought into the decorating part. Our kits come with a variety of sequins, colored foil sheets, or fake flowers in addition to colored royal icing, but don't let that stop you from thinking outside the box. Get creative, and have fun!
Looking for a colored royal icing tutorial? Follow the link below.
How to Make Colored Royal Icing for Sugar Skulls Made of Sugar
